Tutorial
Click on thumbnailed images to enlarge
In this tutorial I will show you how to magnify a certain part of an image using Photoshop and Reshade – Image Enlarger. We will use a random image of a grape (stock image). Actually, the image is not so important, because we want to show you the technique to use for your own images.
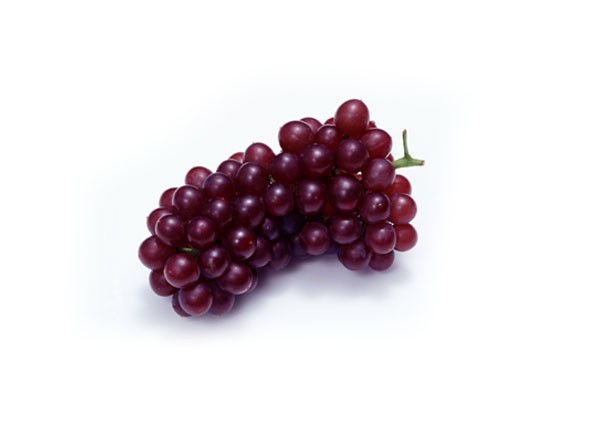
So, let’s begin by opening this image in Adobe Photoshop (File->Open or simply drag and drop the image on your canvas).
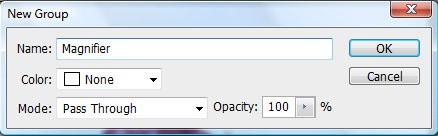
Now, let’s create a magnifier, so we can take a closer look at this tasty grape. So, in order to do that, we will create a SET in which we will create the magnifier. So, go to Layer -> New -> Group and click. The name of the set will be Magnifier.
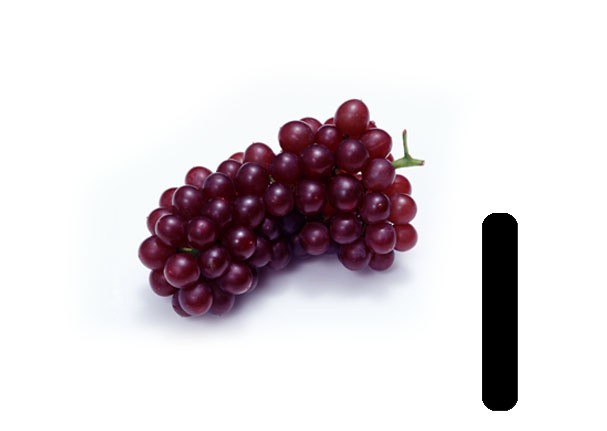
Now, let’s create the magnifier. Create a new layer and name it handlebar (Layer->New->Layer or CTRL+SHIFT+N).
In this layer make a selection using the Rectangular Marquee Tool that will look somehow like mine (this will be the handle of the magnifier, so just make it look like a handlebar – also try to imagine the round magnifying part so that all will look more realistic).

Right-click inside the selection and choose Fill. In the little window that will appear, choose Black in the Use drop-down menu. Do not deselect.
Now, we will have to make this look real. So, go to Select -> Modify -> Smooth. Select a Sample Radius of around 10px. Click OK. You will notice how the selection has now round corners. Right-click in the selection and choose Select Inverse. Hit the Delete key. Deselect. You should end up with something like this:
Let’s give some depth to that handlebar. Go to Layer -> Layer Style -> Blending Options.
Here are the settings I’ve used:

So, we have the handlebar. Let’s make the actual magnifier now. Create a new layer (Layer -> New-> Layer or CTRL+SHIFT+N ) and name it Magnifier. Select the Eliptical Marquee Tool (it is under the Rectangular Marquee Tool if you have trouble finding it). Make a round selection that will look like the support for the magnifier (hold Shift to create a perfect circle). Try to make the selection above the handlebar. Fill it with black (right click -> Fill -> Use: Black -> Ok).Now go to Select-> Modify -> Contract. Select Contract by something around 12px.You should end up with something like this:

Under the Blending Options (Layer -> Layer Style -> Blending Options), choose this settings:

Ok, let’s magnify that grape. Click on the Magnifier Layer Set (NOT LAYER, the Set) and click Edit -> Free Transform (or CTRL+T) and move it above the grape (maybe rotate it a little bit).Our image looks like this:

Now comes the really interesting part. Magnifying the original grape image. As we all know, Photoshop is the best image editor around, but, by being so complex, it has it’s issues. One of them is enlarging an image. It does the job, but it doesn’t do it very good (you don’t really have a lot of options on that). So, we will use a really great tool, that it will do the job better. The Reshade – Image Enlarger.
So, open the original grape image in this software (File -> Open).
I used this settings (feel free to play with those settings and create your own version of the image).

Save the image and open it in Photoshop. Go to Select->All (or CTRL+A), after that go to Edit -> Copy (CTRL+C) and File -> Close (CTRL+W).
Move the image under the Magnifier Layer set. Layer -> Arrange -> Send Backward (or CTRL+[)The layer order should be like this:

Now, go to Edit -> Free Transform and just move the image so inside the magnifier is the “zoomed” part.
Click on the Magnifier Layer. Select the Magic Wand Tool and simply click inside the magnifier (the circle inside). Go to Select -> Modify -> Expand and enter a value of around 2-3 px and click Ok.
Now, click again on the Layer 1 (the one with the zoomed grape). Right click, and choose Select Inverse and then press the Delete key. Do not deselect.
The image should look like this:

Again, right click and choose Select Inverse. Go to Filter -> Distort -> Spherize and choose an amount of around 25-30%. Click Ok.
With the selection still active, create a new layer (Layer-> New-> Layer or CTRL+SHIFT+N) and name it glass. Go to Edit->Fill and choose Use: White and Opacity: 10px.
If you want, you can play with the white reflexions or add some features to the magnifier, but this is optional, due to the fact that the main idea of this tutorial was to show you how to make a general magnifier.
My final image looks something like this:

So, let’s begin by opening this image in Adobe Photoshop (File->Open or simply drag and drop the image on your canvas).
Now, let’s create a magnifier, so we can take a closer look at this tasty grape. So, in order to do that, we will create a SET in which we will create the magnifier. So, go to Layer -> New -> Group and click. The name of the set will be Magnifier.
Now, let’s create the magnifier. Create a new layer and name it handlebar (Layer->New->Layer or CTRL+SHIFT+N).
In this layer make a selection using the Rectangular Marquee Tool that will look somehow like mine (this will be the handle of the magnifier, so just make it look like a handlebar – also try to imagine the round magnifying part so that all will look more realistic).
Right-click inside the selection and choose Fill. In the little window that will appear, choose Black in the Use drop-down menu. Do not deselect.
Now, we will have to make this look real. So, go to Select -> Modify -> Smooth. Select a Sample Radius of around 10px. Click OK. You will notice how the selection has now round corners. Right-click in the selection and choose Select Inverse. Hit the Delete key. Deselect. You should end up with something like this:
Let’s give some depth to that handlebar. Go to Layer -> Layer Style -> Blending Options.
Here are the settings I’ve used:
So, we have the handlebar. Let’s make the actual magnifier now. Create a new layer (Layer -> New-> Layer or CTRL+SHIFT+N ) and name it Magnifier. Select the Eliptical Marquee Tool (it is under the Rectangular Marquee Tool if you have trouble finding it). Make a round selection that will look like the support for the magnifier (hold Shift to create a perfect circle). Try to make the selection above the handlebar. Fill it with black (right click -> Fill -> Use: Black -> Ok).Now go to Select-> Modify -> Contract. Select Contract by something around 12px.You should end up with something like this:
Under the Blending Options (Layer -> Layer Style -> Blending Options), choose this settings:
Ok, let’s magnify that grape. Click on the Magnifier Layer Set (NOT LAYER, the Set) and click Edit -> Free Transform (or CTRL+T) and move it above the grape (maybe rotate it a little bit).Our image looks like this:
Now comes the really interesting part. Magnifying the original grape image. As we all know, Photoshop is the best image editor around, but, by being so complex, it has it’s issues. One of them is enlarging an image. It does the job, but it doesn’t do it very good (you don’t really have a lot of options on that). So, we will use a really great tool, that it will do the job better. The Reshade – Image Enlarger.
So, open the original grape image in this software (File -> Open).
I used this settings (feel free to play with those settings and create your own version of the image).
Save the image and open it in Photoshop. Go to Select->All (or CTRL+A), after that go to Edit -> Copy (CTRL+C) and File -> Close (CTRL+W).
Move the image under the Magnifier Layer set. Layer -> Arrange -> Send Backward (or CTRL+[)The layer order should be like this:
Now, go to Edit -> Free Transform and just move the image so inside the magnifier is the “zoomed” part.
Click on the Magnifier Layer. Select the Magic Wand Tool and simply click inside the magnifier (the circle inside). Go to Select -> Modify -> Expand and enter a value of around 2-3 px and click Ok.
Now, click again on the Layer 1 (the one with the zoomed grape). Right click, and choose Select Inverse and then press the Delete key. Do not deselect.
The image should look like this:
Again, right click and choose Select Inverse. Go to Filter -> Distort -> Spherize and choose an amount of around 25-30%. Click Ok.
With the selection still active, create a new layer (Layer-> New-> Layer or CTRL+SHIFT+N) and name it glass. Go to Edit->Fill and choose Use: White and Opacity: 10px.
If you want, you can play with the white reflexions or add some features to the magnifier, but this is optional, due to the fact that the main idea of this tutorial was to show you how to make a general magnifier.
My final image looks something like this:
Tutorial Comments
Showing latest 7 of 7 comments

Hahaha, totally awesome! Serious revenge! (For those ex-boyfriends I don't have, but wish I did for this reason!)
By PaigeTurner on Jul 11, 2009 11:24 pm

Coooool.
By Eww on Mar 19, 2009 11:20 pm

ooh this will good for ads.
By creole on Feb 28, 2009 4:47 pm

Wow it looks ah-mazing :D
By patternhouses on Feb 14, 2009 6:16 pm

wow u're good ^^ it's awesome
By nolee on Feb 10, 2009 6:40 pm

this is great !
By futura on Feb 5, 2009 2:29 pm

wow dats pretty cool....
i always wanted to learn how to do this
By elrene06 on Jan 31, 2009 7:55 pm
Tutorial Details
| Author |
web
|
| Submitted on | Jan 27, 2009 |
| Page views | 17,096 |
| Favorites | 30 |
| Comments | 7 |
| Reviewer |
manny-the-dino
|
| Approved on | Jan 28, 2009 |